Create a Light Textured Web Design in Photoshop
In this web design tutorial, we’ll be creating a light textured web page layout. I will show you how apply subtle textures in web layouts, how to create a seamless diagonal mosaic pattern and how to create a tabbed content area design for the “Services” section.
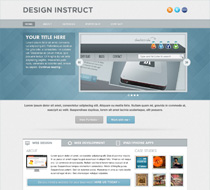
Preview
Click the image below to see it in full size.
Tutorial Resources
960 Grid System Introduction
In this tutorial, we will use the 960 Grid System to organize and arrange the elements of our web layout. Before we begin, download it to your computer.
Unzip the archived file you downloaded, go to the “templates” folder and then go to the “photoshop” folder. You will find three .PSD files. Each of these files contains a grid with 12, 16 and 24 columns. In this tutorial we will be using the 12 columns grid.
The .PSD files have some guides already set up, which will be very useful. To activate the guides, go to View > Show > Guides, or use the shortcut Ctrl/Cmd + ;.
During this tutorial you will need to create shapes with specific dimensions. To see the exact size of a shape or selection while you are creating it, open the Info Panel by going to Window > Info. The width and the height of your shapes and selections will be displayed in this panel.
Now that we covered the basics of using the 960 Grid System, we can move on to creating the web layout. Let’s get started!
Tip: If you need a more thorough guide for using 960 GS, I suggest reading the guide called The 960 Grid System Made Easy.
Step 1: Creating the Background of the Web Layout
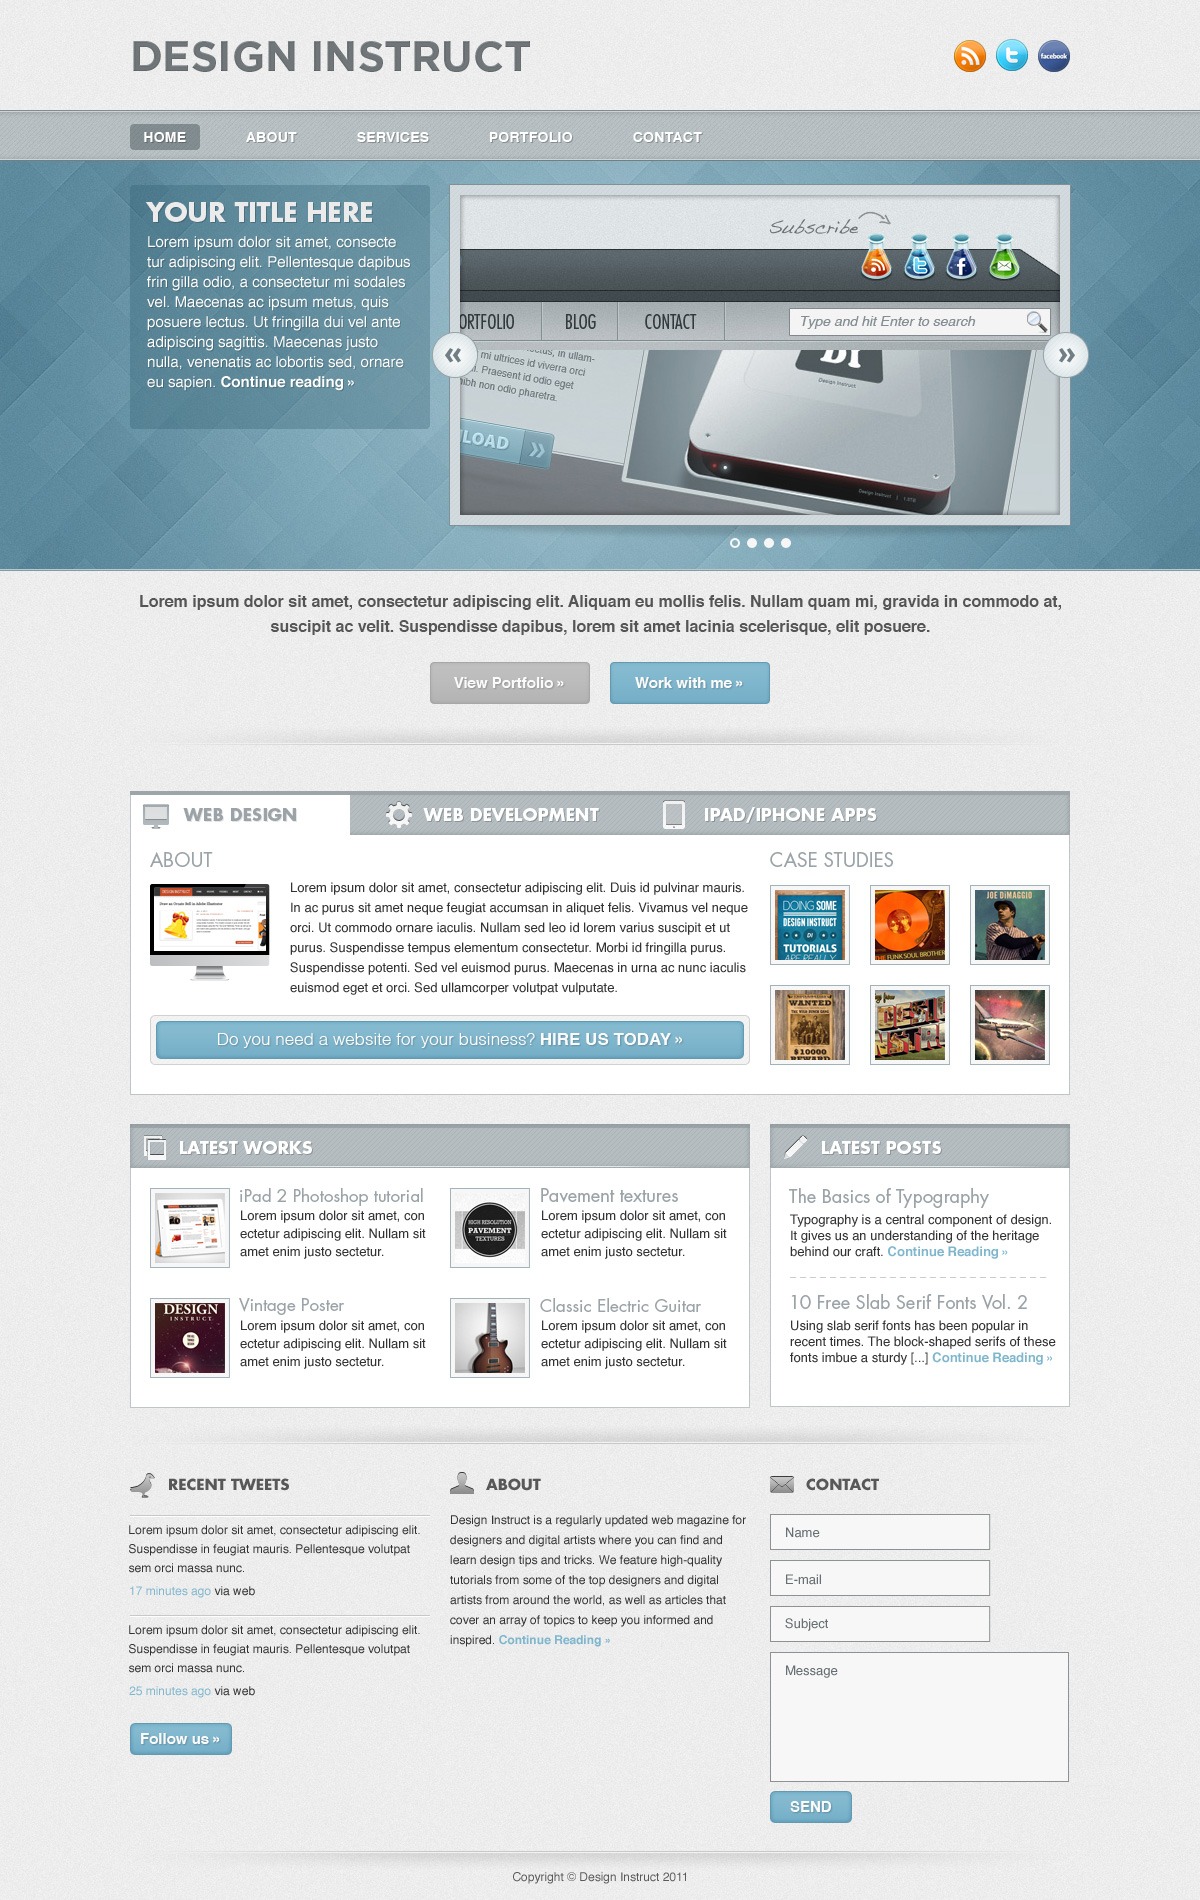
Open the "960_grid_12_col.psd" file in Photoshop. Then go to Edit > Canvas Size and set the width to 1200px and the height to 1900px. You can adjust the height later on if you need more space for the web layout.
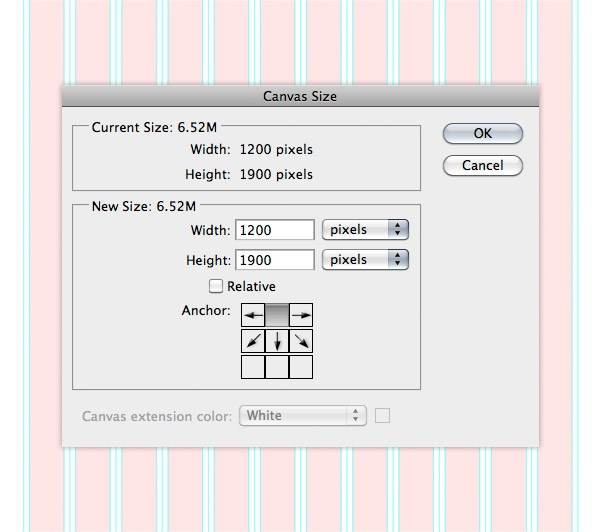
Now we will change the color of the background from white to a light gray. With the "Background" layer selected, click on the little black lock icon from the top of the Layers panel to unlock this layer. Then change the color of the background layer to #ededed.
Right-click on this layer and select Convert to Smart Object. Then go to Filter > Noise > Add Noise and set the Amount to 1%, the Distribution to Gaussian and tick the Monochromatic box.
Step 2: Creating the Header
We will create a simple header with the name of the web layout and some social media icons. Create a new group and name it "Header". Then select the Type Tool (T) and write the name of your layout. I used the font Gotham Bold with the size 42pt and the color #707679. Align this layer with the grid, as you see in the image below.
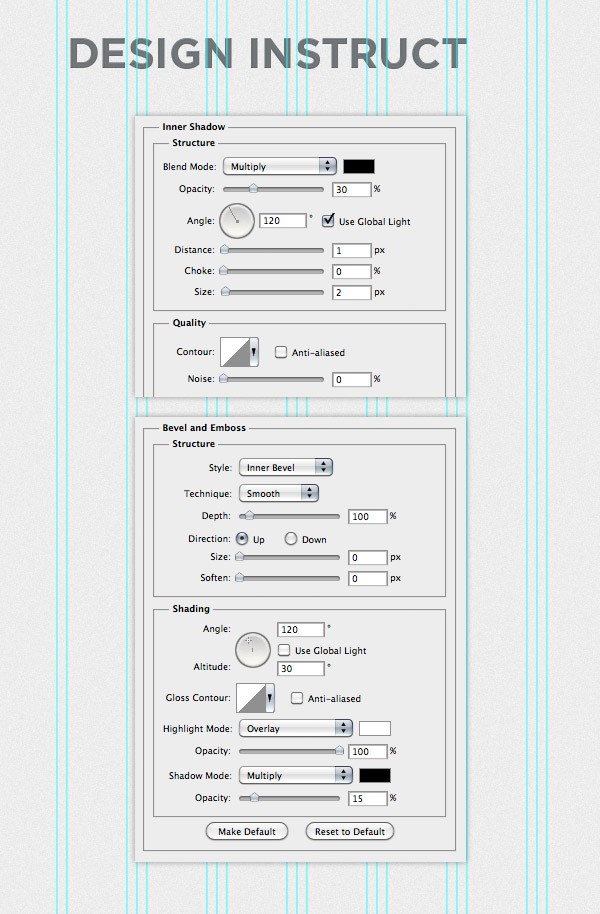
Double-click on your text layer to open the Layer Style window and use the settings from the following image.
Now we will add the social media icons. Download this set of icons and open the RSS, Twitter and Facebook icons in Photoshop (or any other icons you want to include in your design). Use the Move Tool (V) to move these icon into your web layout document and put them in the right side of the web layout. Leave a distance of 10px between icons.
Select all these layers, hit Ctrl/Cmd + G to group them and name the group "social icons".
No comments:
Post a Comment